You can restore an antique top to full use without guessing. This guide shows what “replacing a table leaf” means for an antique piece and how to plan a small furniture project. Expect multiple days, beginner-level work, and about $100–$200 in costs.
Start with careful checks: match the edge profile, identify species or grain, and test stain plus varnish on a scrap. If you can’t match perfectly, choose a complementary tone that looks intentional in your dining room.
Antique inserts can be tricky. Wood movement, older tracks, and tiny profile differences cause gaps or rocking. You’ll preview two paths: buy a pre-cut blank or build a custom panel based on your tools and patience.
Measure and assess before you cut. This is the biggest success factor. In the rest of the article you’ll learn to evaluate your dining table, size the piece for a flush fit, build or source the insert, then install and troubleshoot alignment and sliding issues.
Assess Your Antique Dining Table Before You Start
Begin by closely examining the top, the join, and the moving parts. This quick survey tells you which path to take: buy a blank or build a custom insert.

Confirm style and mechanism
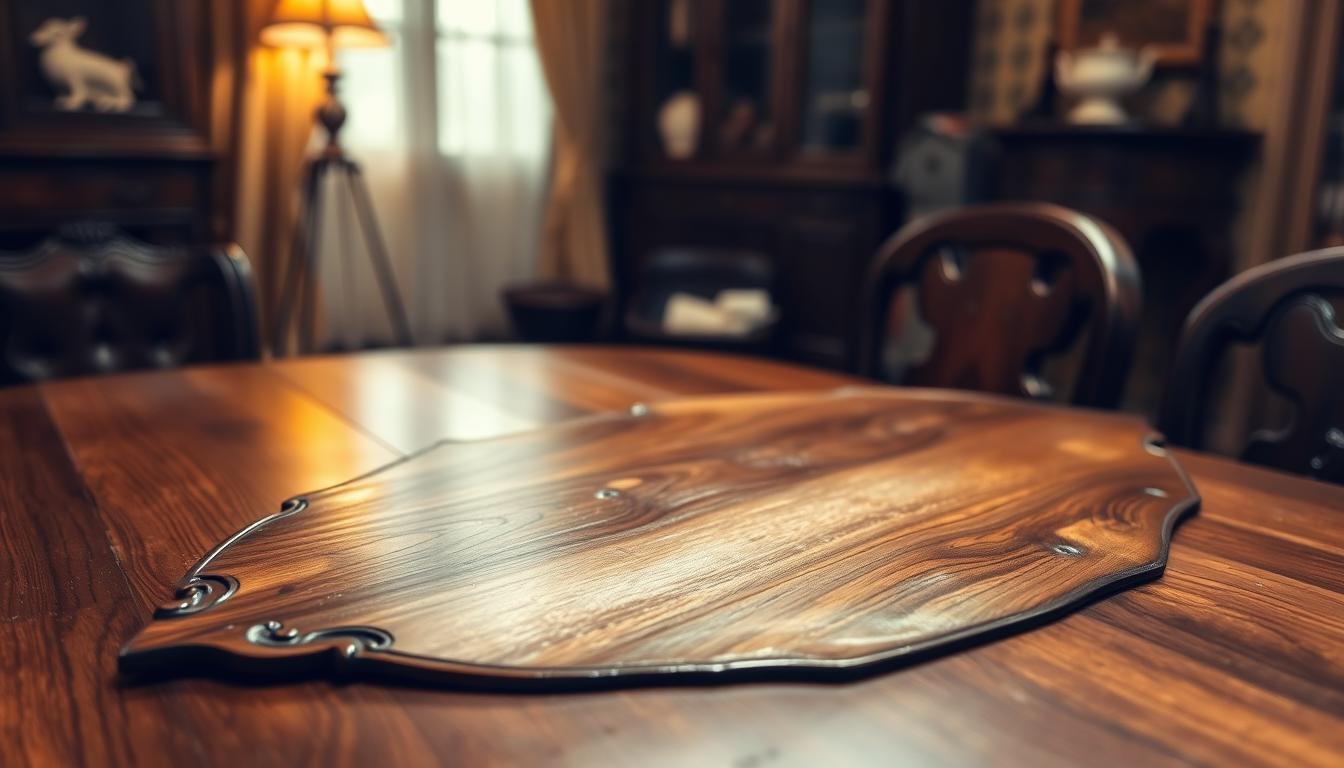
Identify which insert type you have: butterfly, drop, removable, or concentric. Each style changes how you measure and where hardware goes.
Check the mechanism under the top — slides, pins, brackets, or locks — and note bent or missing pieces that could prevent a proper fit.
Check the edge profile
Study the edge along the existing top and any insert. Decide whether you can match it with a common router bit or should simplify while staying consistent.
Identify wood species and stain behavior
Match grain character, not just color. Different species absorb stain differently, so use sample boards for test staining before finishing the new insert.
Inspect tracks, slots, ends, and seams
- Clean and move each track; look for debris or binding that causes sticking.
- Measure slots and receiving holes for dowels or pegs; watch for wallowed-out holes.
- Examine ends and the seam line for chips, old repairs, or other damage.
- Verify the surface is flat and the base sits level; sometimes uneven floors or warped frames, not the insert, cause misalignment.
Your Options for Replacing a Table Leaf: Buy Pre-Cut or Build Custom
Choose between off-the-shelf blanks for speed and custom work for precision. Your choice affects cost, time, and how well the insert matches the dining room table top.

Buy a ready-made blank
Quick and convenient: Pre-cut blanks (common red oak, 13/16″ thick) come in narrow widths like 11″ and lengths such as 42″ or 48″. You sand, stain, and add alignment parts to match your top.
Verify thickness and the exact length before you order. Note UPS Ground shipping and a possible $20 oversized surcharge per piece.
When custom is the better fit
Choose custom when your dining table needs non-standard widths, special edges, or unique slide spacing. Custom work also helps when you need multiple pieces for longer extensions.
Plan for time, complexity, and budget
DIY builds take multiple days and usually cost $100–$200 for lumber, hardware, sandpaper, finish, and possibly a router bit. Measure and dry-fit carefully; finishing adds extra days for cure time. Investing effort up front gives you a better experience and a cleaner fit in daily use.
Measure for a Flush Fit on the Dining Table Top
Measure carefully across the opened gap; accuracy here saves finish and fit work later. Pull the two halves apart on their tracks and measure the clear length the leaf must fill. Confirm the final overall length with the piece in place so you know the true finished size.
Length, width, and thickness
Record the gap length, then measure width and thickness of the existing top. Even 1/32″ of difference can show on a polished surface, so note tolerance and plan cuts to match.
Hardware, slots, and alignment
Map peg, dowel, and bracket positions like you would a drilling plan. Measure centerlines, distances from ends, and slot width/depth so parts line up when you assemble.
Dry-fit and seasonal movement
Dry-fit the blank with clamps or temporary spacers. Check for rocking and verify both seams close evenly before routing edges or finishing.
- Test the two-halves push: confirm ends align and the surface stays flat.
- Allow a hairline seam for seasonal movement; tight fits can bind in humid months.
- Fix any sticking on tracks now—most alignment problems start there.
Build a Matching Dining Table Leaf from Wood
Set up a clear workspace and sort your wood so grain and color match across the panel. This saves time and helps you spot boards with twist or visible damage before you cut.
Materials and tools for a beginner-friendly build
Core tools: miter or track saw, biscuit joiner or dowel kit, drill and bits, measuring tape, clamps, and sanding supplies. Add layout helpers like dowel centers and a digital angle finder.
Cutting and joining for strength
Edge-join boards into a stable panel using wood glue and #10 biscuits or 1/4″ dowel pins. Clamp dry-fitted pieces and mark centerlines for consistent join spacing.
Replicate the edge and ends
Match the existing profile with a router bit or reproduce the end detail so the seam looks intentional. Work slowly and test on scrap until the match is clean.
Sand, prep, and finish
Use a straightedge to check flatness and correct high spots gradually. Test stain and polyurethane on a small sample first; different species like oak absorb stain differently.
- Stain before final assembly to speed time between steps.
- Control glue squeeze-out and fill only after final dry-fits to avoid surface damage.
- Handle the piece like finished furniture during fitting to prevent dents.
Install, Align, and Troubleshoot Your Replacement Leaf
Place the new piece carefully and follow simple steps so the mechanism isn’t forced. Clear crumbs and dust from the opened seam, then pull both halves apart evenly until you can see the slots and brackets.
Lift the panel right-side up and lower it straight into the slots. Work with a helper for larger pieces to keep the surface level and prevent damage to pegs or holes.
- Align pegs/brackets with the holes and push both halves toward the center to tighten seams.
- Engage any underside locks or catches, then run your hand across the surface to confirm flushness.
- Store any removed hardware in a labeled bag near the dining room so reassembly is quick.
Troubleshooting steps: If seams sit uneven, check for loose screws in hinges or brackets and tighten or replace them. Verify the frame sits level on the dining room floor; an off-level base can mimic misfit.
- Sticking tracks: vacuum slots, remove debris, and apply a light furniture lubricant to slides.
- Misalignment: confirm both slides extend equally and adjust pin depth or hardware placement before sanding high spots.
- Seasonal swelling: store leaves flat in a dry room wrapped in breathable fabric to avoid warping and long-term damage.
Follow this step-by-step approach to lock in a clean fit and protect the surface from future problems. Proper storage near the dining place reduces handling and keeps your leaves ready when guests arrive.
Conclusion
Close with care that keeps your work reliable for years.
Store leaves flat, wrapped in breathable fabric in a dry place. Avoid direct sunlight and plastic covers to prevent warping and fading.
Keep alignment parts and slides clean. Check screws and brackets periodically and manage humidity so seams stay tight through seasonal changes.
If the base sits out of square, hardware is missing, or the top needs flattening, call furniture experts. Professional repair protects value and saves time.
Choose speed or custom based on fit: standard blanks save time; custom work gives a better experience for odd edges or rare parts. Measure twice and dry-fit before finish for the best long-term result in your home.


