Repairing wood veneer on a table, cabinet, or other furniture piece starts with understanding why the edge failed.
Thin veneer behaves like solid wood: heat, moisture, and age cause loose edges and corners. You’ll learn to tell when an edge needs re-gluing and when it needs a patch.
This guide previews two common problems: peeling edges and bubbling veneer. The fix changes depending on how the substrate looks under the thin layer.
Act early. Small edge damage usually snags and spreads. With careful prep, steady pressure, and finish blending, you can often make a repair disappear from normal viewing distance.
You’ll cover re-gluing and patching so you don’t force a loose edge down when it needs replacement. Safety and patience matter: use a sharp knife, control glue, and allow full cure time.
How to Tell If Your Veneer Edge Needs Regluing or a Patch
Inspect the lip, the grain, and any hollow spots before you decide what to do. A quick hands-on check saves time and prevents needless work.
Peeling edges vs. bubbling spots
Peeling edges usually look like a raised lip that will catch your fingernail. That raised strip often stays flexible and may press back down when you add adhesive.
Bubbling feels like a small dome or hollow on the surface. Press it lightly: if it springs back or you hear crunchy old glue, the bond has failed and moisture may be trapped underneath.

Common causes and where to check first
Over time, heat, water, and age dry or soften the original glue. Corners, front edges, and areas near sinks, windows, or heat registers are hot spots for this kind of damage.
- Lightly press bubbles to feel for hollows.
- Run a fingernail along the edge to find a raised lip.
- Look for grain cracks that show brittle patches.
Decision rule: if the thin layer is intact and bends without cracking, regluing is usually enough. If it’s chipped, torn, or missing, plan on a patch or filler for a lasting fix.
Tools and Materials You’ll Want on Hand for Veneer Repair
A tidy, organized workspace is the single best step toward a clean veneer fix. Stage your tools so you can work quickly once adhesive is open and avoid trapped messes.
Essentials:
- Putty knife for gentle lifting and a sharp utility knife for clean cuts under the edge.
- Clean rags and a damp, warm cloth to wipe squeeze‑out immediately.
- Wax paper to protect surfaces and keep clamps from sticking to the finish.
Pressure options:
- Use clamps for narrow edges and corners; apply flat, even pressure to avoid new ridges.
- For wide bubbles, stacked books or heavy flat weights work well when used over wax paper.
- Allow clamping or weight time of roughly 6–24 hours depending on adhesive instructions.
Adhesives and fillers:
- Wood glue (Titebond is a common choice) for most interior repairs; contact cement if you need instant grab.
- Wax sticks and burn‑in filler for tiny chips; wood filler for deeper missing material.
- Keep a plastic scraper or old credit card to level wax or filler before final blending.

Surface Prep That Makes the Glue Bond Last
Before you squeeze in adhesive, set up the area so the bond can do its work. Good prep keeps a repaired edge from lifting again and makes finishing easier.
Safely lift the loose layer. Slide a sharp knife at a shallow angle and lift just enough to slip paste under the lip. Work slowly so you don’t split the grain or tear small pieces.
Check the back and exposed core
Peek under the lifted strip to see if you’re bonding to clean wood or crumbly old glue. Remove any loose pieces so the new bond meets solid material.
Clean contaminants before you glue
Remove wax, polish, and old adhesive so the new glue touches the real surface. Hot water can soften and wash away hide glue and wax residue.
When to use denatured alcohol: Alcohol can crystallize and lift old hide glue so the layer separates cleanly. Use it sparingly and test a hidden point first.
Fix the substrate so veneer lays flat
Fill dents or missing core with a suitable filler and level the area. Make sure the repair zone is dry and test-fit before clamping so pressure stays even.
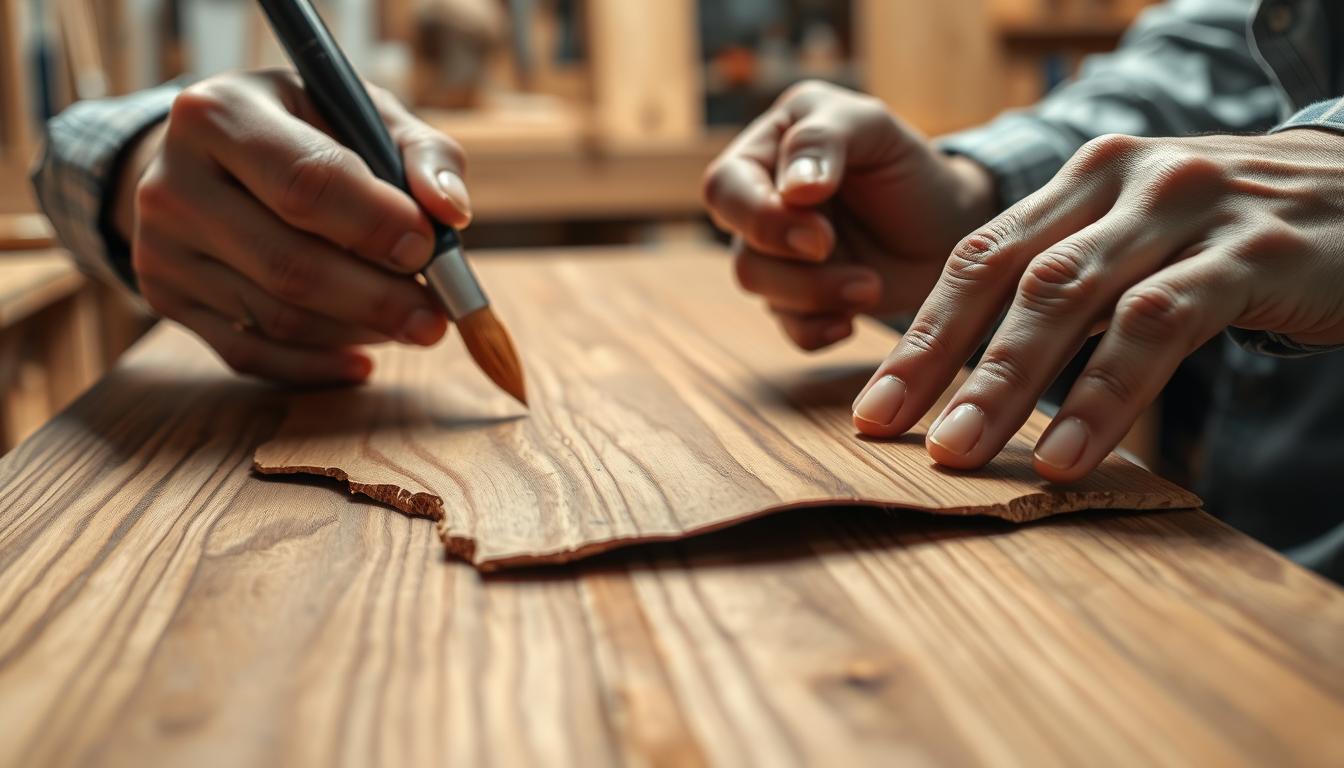
Repairing wood veneer by Gluing Down Peeling or Bubbling Edges
Apply a measured bead of glue under the lifted edge and use a thin tool or a folded scrap to spread it so the entire surface is covered. This prevents dry pockets that can re-bubble later.
Choose the right adhesive and spread it evenly
For controlled fixes, use Titebond or a quality wood glue. For wide areas that need instant grab, contact cement makes sense. Put adhesive on both the substrate and the underside, then press the layer back in place.
Clamp setup and protection
Place wax paper over the repair, add a flat caul, and apply light, even pressure with clamps or heavy books. Too much force will crush the edge; just enough to seat the veneer is best.
Handle squeeze‑out and cure times
Wipe excess glue immediately with a warm, damp cloth to avoid shiny residue. Keep pressure for roughly 6–24 hours depending on the adhesive.
Set time is when the bond holds; fully cured means the glue reached full strength—avoid heavy use until then.
Troubleshooting and final check
If the layer won’t lay flat, reopen carefully, remove lumps, re-clean, reapply glue, and reclamp with a flatter caul. Finish by feeling the edge, looking for gaps, and confirming the surface is flush before filling or finishing.
Fixing Chips, Missing Veneer, and Gaps Along Edges
When margins are torn or bits are missing, a patch can be the smarter fix. Choose a patch when fibers are gone, edges crumble, or a loose lip won’t stay glued flat.
Cut a clean opening. Trim ragged damage into straight, neat lines so your new piece fits tightly. Straight edges make clamping and blending easier.
Fitting and orienting a new piece
Select a new piece that matches grain and figure. Orient the grain to follow the surrounding pattern so the patch hides better when finished.
Small gaps and fillers
For tiny voids, press wax filler sticks into the gaps and level them with a plastic scraper. Leave the filler slightly proud, let it harden, then scrape and sand flush.
Choosing filler for stainable repairs
Use wood filler for deeper missing areas that will be sanded and stained. Putty works for surface blemishes but often needs tinting to match. Test a small area before finishing.
Fast edge chip fixes
Hard burn-in filler sticks melt into chips and harden quickly. After cooling, scrape flush with a plastic scraper and blend carefully to avoid shiny halos.
- Clean old glue and wax first; denatured alcohol helps release hide glue.
- Leave patched areas proud, then level to protect older surrounding layers.
- Remove excess filler with a buffing pad and keep the rest only inside the void.
Leveling, Sanding, and Blending the Finish So Repairs Disappear
Start by bringing any proud patch flush with its neighbor so the eye never finds the edge. A smooth profile makes color and grain blending far easier. Work slowly; haste often exposes lighter core or cuts through thin veneer.
Leveling without cutting into the surrounding surface
Use a sharp scraper first to shave the high spots. Test your scraper on the patch at a low angle and stop when the transition feels even to your fingertip.
Finish with very fine sandpaper (320–400) and light strokes. Mask the perimeter with tape to protect the surrounding finish, especially on a table edge where the layer is thinnest.
Color matching and grain alignment
Always test stain on a scrap or an inconspicuous back part before you touch the repair. Match the undertone first, then deepen the color in thin coats until it blends.
Pay attention to grain direction. Even a perfect color can betray the fix if the grain runs the wrong way on a reflective finish.
Even sheen and protecting the top
If you used wax filler or burn‑in sticks, seal the area so the sheen matches the rest of the finish. A compatible clear coat—varnish, lacquer, or polyurethane—evens out flashier spots.
For historic pieces, a thin wax top gives the right look but apply a durable clear coat on high‑use tops. Let the finish cure fully before regular use to preserve your repairs.
- Tip: Work in small stages—level, then stain, then topcoat.
- Tip: Keep tools sharp and pressure light to avoid new damage.
- Tip: Match grain and sheen, not just color.
Conclusion
Good prep and proper pressure are the two things that most often decide how long a fix lasts. Diagnose the damage, clean and prep the area, spread glue for full coverage, clamp flat, then fill and refinish where needed.
Keep moisture and heat away from vulnerable spots. Use coasters and mats, wipe water up quickly, and avoid setting hot pans on the table. Control indoor humidity around 40–60% to reduce movement that causes bubbles and lifting.
Choose gentle cleaners and polish with wax every 6–12 months. Inspect front edges and corners regularly so small issues don’t spread into larger damage.
With careful surface work, correct clamping, and color matching, most repairs won’t be obvious at normal viewing distance. Over time, routine care is the best way to protect your furniture.


