Removing old wood finish means taking off paint, stain, varnish, shellac, or lacquer so you can refinish a piece safely.
You want a process that protects your health and the surface. Safety has two sides: your lungs, skin, and eyes, and the furniture’s grain, veneer, edges, and details.
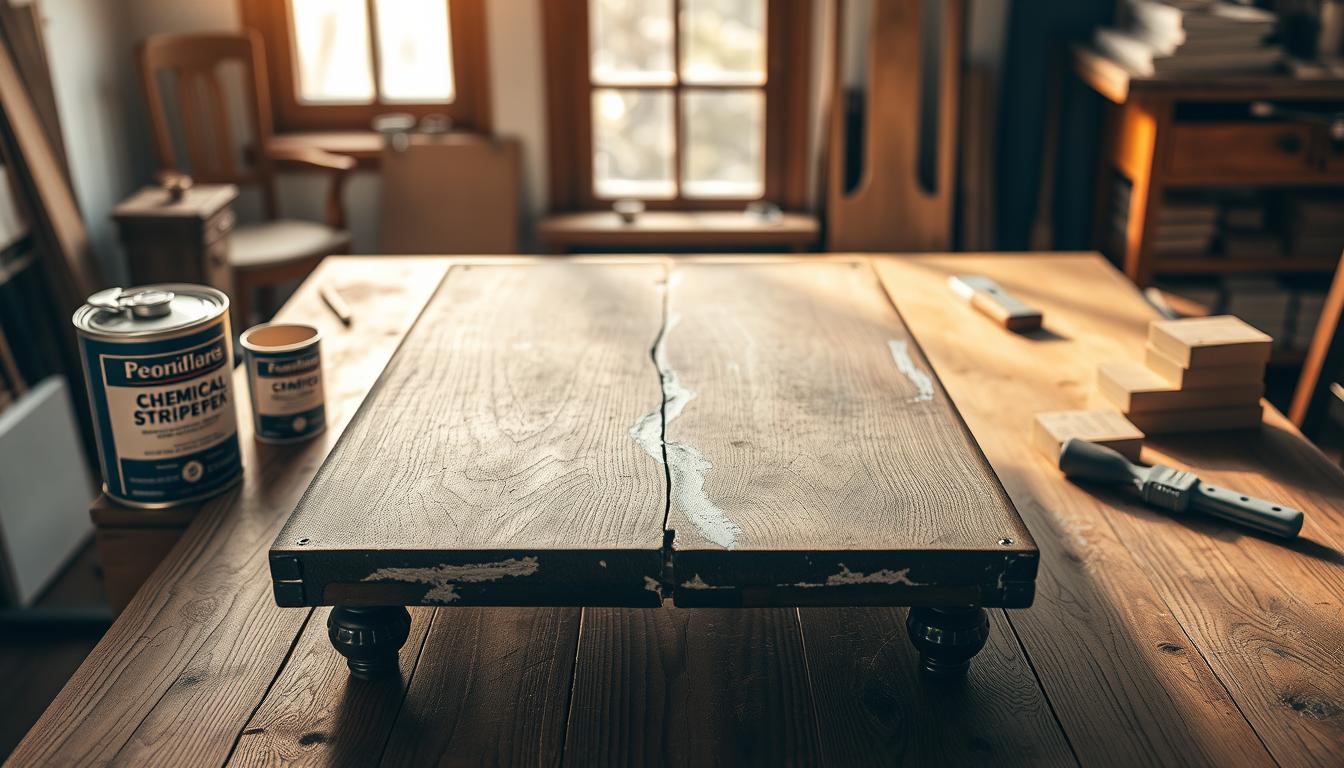
Both chemical strippers and sanding are valid. Many projects use a hybrid approach to balance speed and care. You’ll learn when each method works best.
This guide previews the key decision factors: where you work (indoors vs. outdoors), how thick the layers are, and how delicate the piece is. The goal is a controlled, repeatable process that reduces rework.
Throughout the article you’ll see product categories (lower-fume versus stronger strippers), safe sanding technique so you don’t damage wood, and steps for residue cleanup and disposal.
Why “Safer” Matters When You’re Refinishing Wood Furniture Today
How you protect your body and the furniture will shape the method you pick. Safety covers two things: health risks from chemicals and dust, and the risk to the surface you care about.

Health exposure basics
Chemical strippers can give off strong fumes and cause skin irritation. Use gloves, eye protection, and clear ventilation in the work area to cut exposure.
Watch labels: avoid products with methylene chloride or NMP. A safer paint remover choice lowers long-term risk and reduces household tracking of vapors.
Sanding creates fine dust you can breathe and carry through your home. Wear a respirator and contain dust when you sand.
Surface risk basics
Chemicals often sink into crevices gently and keep carved trim intact.
By contrast, aggressive sanding can flatten profiles and blur the grain. Keep power pads flat and move slowly to prevent low spots.
Veneer is thin; one heavy pass can expose substrate and change how stain looks. Match your method to the material of the piece furniture.
- Quick checklist: assess material, ventilate the area, read labels, and choose the gentlest effective method.
Assess Your Piece Furniture Before You Start Removing Finish
A quick hands-on check will tell you whether the piece can take sanding or needs gentler care. You’ll save time and avoid damage by spotting construction clues first.
Look under drawers, on the underside, and at any chipped edges. These spots often reveal layers or reveal a wrapped veneer. Peeling or bubbling at an edge is a clear sign of veneer, while consistent end-grain and tight joints usually mean solid wood.

Where to inspect and what to look for
- Check inside drawers and on the back panel for stamps or brand labels that identify materials.
- Expose damaged corners to see if you find a thin layer over a different substrate—this signals manufactured panels or particle board.
- Tap panels lightly: a hollow sound often means engineered board; a solid thud suggests solid wood.
When details change the safest method
Ornate trim, fluting, and tight crevices can hide thin layers and fragile edges. In those areas, sanding risks flattening profiles and exposing substrate.
If your goal is a natural wood look or a smooth re-stain, match the method to construction: choose gentle chemical stripping and fine brushing for carved pieces, and reserve sanding for broad, flat surfaces on solid pieces.
Prep the Furniture and Work Area for a Cleaner, Safer Process
Starting with a clear plan for your space reduces risk and mess. Clear the room and choose a well-ventilated place for the project. Lay a plastic drop cloth or kraft paper under the piece to protect floors and nearby surfaces.
Remove hardware, doors, and drawers
Take off knobs, hinges, and handles first. Bag and label each group so reassembly is fast and you don’t lose screws. Pull drawers and doors and work on them flat to control drips and reach tight spots.
Work small and protect the area
Plan the job in 3×3-foot sections. Small areas keep the remover active and make cleanups simple. Keep a dedicated trash place for scraped residue so chips don’t spread across the floor.
Choose safe containers and keep water handy
Avoid plastic bowls with chemical remover; some products react with plastic. Use metal or glass containers instead. Have a little water nearby for quick basic cleanup if the product instructions allow it, but follow the remover’s directions for rinsing.
- Quick checklist: remove and label hardware, work flat on doors/drawers, cover the work area with a cloth or plastic, work in 3×3 sections, use metal or glass containers, and set a collection place for residue.
Personal Protective Gear and Fire-Safe Handling You Shouldn’t Skip
The right gear and a clear rag plan keep your process safe and predictable. Make sure you match PPE to the hazard every time you work.
Gloves, goggles, and masks that fit the hazard
For stripping with strong chemicals, wear chemical-resistant gloves and splash goggles. For sanding, use a properly rated dust mask or respirator designed for fine dust.
Tip: Disposable gloves are fine for light stains; nitrile or neoprene is better for heavy solvents.
Ventilation and flame safety
Open doors and windows and run a fan to push fumes outside. Do not use heaters or any open flame near solvents—many products and stains are flammable or produce volatile vapors.
Rag safety, residue, and cleanup
Lay used cloth flat to dry and keep them separated. Never wad solvent-soaked cloths into a trash bag; heat can build and cause spontaneous combustion.
- Collect scraped residue into a dedicated container for disposal.
- Plan dust containment before sanding: use a vacuum with a HEPA filter and seal the work area.
- Treat PPE and rag handling as part of the job, not an optional extra.
Chemical Strippers: How They Work on Old Finish, Stain, and Varnish
A paint remover softens coatings so you can lift them instead of grinding. The solvent breaks the bond between the coating and the surface. That means you scrape away softened material rather than sand aggressively.
What you see when it works: cracking, bubbling, and raised beads of coating. Those spots wipe or pull back with a putty knife. Test a small area after about 25–30 minutes to confirm dwell time.
Two simple rules cut rework: use plenty of product and give it time. Thick application and covering the area slows evaporation and boosts performance. Waiting keeps you from gouging or switching to overly harsh sanding.
Why chemicals can be the safer choice
Chemical stripping often works well on carved trim, corners, and profiles where sanders round edges or miss recesses. Multiple coatings—stain plus varnish or paint over varnish—usually respond better to solvents than to heavy abrasion.
- Controlled lifting: you remove layers with a scraper instead of repeated harsh passes.
- Less reshaping: delicate details stay crisp when you avoid aggressive sanding.
- Plan for mess: you trade dust for wet residue, so contain and collect scrapings.
Step-by-Step Chemical Stripping Technique for Best Results
A steady technique is the fastest way to get clean, repeatable results without guessing. Set up one 3×3-foot area at a time so you control drips and keep the product active.
Load the brush and lay the stripper on as a thick coat. Use the flat of the brush rather than brushing it like paint. That reduces evaporation and lets the chemistry work longer.
- Cover the wet coat with plastic wrap or aluminum foil to slow evaporation and help penetration.
- Wait about 25–30 minutes, then test with a rubber-gloved finger to see if the film lifts to bare wood.
- Start with a plastic scraper to protect the surface; only use a metal putty knife carefully if residue resists.
- If the layer stays stubborn, apply repeat coats instead of forcing the scraper and risking gouges.
Work methodically through each area and keep a place for collected scrapings. This simple process helps you get consistent results across the whole piece while protecting delicate details.
Choosing a Stripper Product: Lower-Fume Options vs. Stronger Chemicals
A good product choice balances odor, strength, and the risk to thin veneers and carved detail.
Citristrip basics
Citristrip is brushed on and left about 15–30 minutes. Cover with plastic wrap to keep it wet longer; thicker layers may need a second coat if it dries.
SmartStrip (Dumond)
SmartStrip is low- or no-fume and great indoors. Cover to prevent drying, but expect extra scrubbing in details with a stiff brush.
Minwax Furniture Refinisher
Minwax dissolves shellac, lacquer, and varnish when used with fine steel wool. It’s often gentler on quality veneer and won’t raise the grain like aggressive abrasion.
Klean-Strip and oven-cleaner options
Klean-Strip Paint + Varnish Stripper works faster — many layers can lift in about 15 minutes — but follow with an Afterwash to remove residues.
Easy-Off “Fume-Free” spray can strip quickly in 10–15 minutes on solid pieces, but it is risky on veneer and manufactured panels.
- Match product strength to paint or varnish thickness.
- Lower-fume options can dry out; plan wraps and patience.
- Use Minwax for delicate veneer; reserve oven-cleaner tactics for solid pieces only.
Safety callout: avoid strippers containing methylene chloride or NMP. Ingredient choice matters as much as technique for safer, predictable results.
Cleaning Residue After Stripping: Mineral Spirits, Afterwash, and Surface Prep
After stripping, a sticky residue can ruin how a new coat bonds and looks. Leftover stripper can stay tacky, continue reacting, and change how the surface accepts a stain or sealer.
Why residue matters to quality and safety
Residue interferes with adhesion and causes blotchy stain. You can get uneven sheen or spots that repel or over-absorb your topcoat.
Residue also gums up sanding discs fast. That raises cost, clogs paper, and can lead to scratching if you force a clogged disc.
Wipe-down process that works
Use a clean cloth dampened with mineral spirits to wipe the surface. Work one section at a time so you don’t spread sticky material around.
Tip: use odorless mineral spirits when you’re indoors for easier ventilation. Change cloths often to avoid re-depositing residue.
When to use Afterwash
If the product label calls for an Afterwash (common after stronger strippers), follow that step. Afterwash neutralizes residues and helps prevent later adhesion failures.
- Step checklist: wipe with a cloth + mineral spirits; follow label for Afterwash when required; let the surface dry completely before sanding or re-coating.
- Work methodically and check corners, edges, and profiles where residue hides.
Sanding: When It’s the Safer Way to Remove Old Finish
Bearing in mind fumes and surface risk, sanding can be the best choice when you want to avoid solvents. Use an orbital or palm tool and a clear dust plan to keep the job tidy and safe.
Best use cases: large flat surfaces and small projects
Sanding shines on tabletops, broad drawer fronts, and small repairs where a sander stays flat and controlled. You can skip chemicals and work faster on open panels.
Tradeoffs: dust control vs. chemical fumes, and disc build-up
You trade fumes for dust, so set up containment and a HEPA vacuum to protect your lungs. Old finish can gum up discs quickly, raising material costs and slowing progress.
Use quality sandpaper and expect to change discs often. That upfront cost is the trade for a low-odor workspace.
Veneer caution: how sanding can “blast through” thin layers fast
On veneered pieces, proceed conservatively. Edges and high spots are vulnerable and you can remove veneer in minutes.
Test a small area first to confirm whether sanding is efficient or if a stripper-first hybrid approach suits the piece better.
- Quick guide: prefer sanding for flat panels, plan dust capture, expect disc wear, and protect veneer.
How to Sand Furniture Without Damaging the Wood Surface
Sanding is a precision step that shapes how stain and topcoats will look and perform. Treat this stage as controlled removal, not a rush to bare material. A steady approach protects the grain and gives you reliable results.
Choose your grit
Start around 120-grit as a test. If the coating lifts cleanly, move to finer sandpaper (150–220) to smooth the surface before staining.
Only go coarser if the piece is solid and can handle aggressive cutting. On veneer, stay conservative to avoid cutting through the grain.
Orbital sander technique
Keep the tool moving slowly—about one inch per second—and overlap passes to avoid swirl marks or pigtails. Let the sander do the work; don’t press hard.
Keep the sander flat
Hold the pad flat to prevent low spots and uneven stain absorption. Tilting to “spot fix” carves dips that show later under finish.
Finish by hand sanding
Refine corners and profiles with hand sanding to remove tool marks and soften transitions. Use light strokes with the grain to preserve texture.
- Quick checklist: start at 120-grit, test then move finer; move the sander slowly and overlap; keep the sander flat; finish by hand for clean results and even stain absorption.
Stripping + Sanding Together: A Balanced Approach for Safer, Better Results
Combining chemical and mechanical steps gives you control without overworking either method. This hybrid approach is ideal when thick paint, heavy varnish, or many layers slow progress or gum up discs.
Why the hybrid method works
The stripper removes the bulk of coatings so you avoid long, aggressive sanding that creates dust and wears discs quickly.
Sanding then handles remaining thin film, minor discoloration, and final smoothing for even stain absorption and better results.
Order of operations to follow
- Strip: apply a suitable stripper to lift paint and varnish.
- Scrape: remove softened layers with a plastic scraper or brush.
- Clean: wipe residue with mineral spirits or Afterwash as the product requires.
- Dry: let the surface dry fully before any sanding.
- Sand: finish with light sanding to level and prepare for staining.
Practical benefits and precautions
- Fewer harsh sanding passes means less dust and less chance of rounding edges or exposing veneer.
- You reduce disc gum-up and get more consistent stain results across panels.
- Always re-check veneer and edges before sanding so the careful stripping work isn’t undone.
Tools That Make the Job Safer and More Precise
Good tools let you control how much material you take off and where you take it from. The right kit reduces mistakes and protects carved detail. Below are the essential items to keep the job neat, safe, and repeatable.
Brushes, scrapers, and stripping pads for controlled work
Use a wide brush to apply stripper evenly in broad areas. A dedicated brush for chemical work keeps contamination away from final coats.
Choose a plastic scraper for broad scraping. A plastic scraper cuts risk of scratches compared with metal and preserves edges.
Wire and stiff brushes for crevices and carved detail
Stiff or wire brushes reach tight crevices and lift stubborn residue that a flat scraper misses. Use them gently to avoid marring grain and profiles.
Sandpaper range and specialty sanding tools
Keep sanding blocks, a detail sander, and folded sandpaper on hand for corners and profiles. Start coarser where needed, then move to finer sandpaper for a smooth surface.
- Core kit: dedicated brush, plastic scraper, stripping pads, wire brush, sanding block, and a detail sander.
- Keep a waste container nearby to clean your scraper often and avoid residue smears.
- Separate chemical tools from finishing tools to prevent cross-contamination.
How to Choose the Safest Method for Your Project and Timeline
The least aggressive effective way is your guiding rule: start milder, test, then scale up only if the job needs it.
If you’re working indoors
Prioritize ventilation and low-fume products. Even “low odor” options still smell, so plan airflow and limit exposure.
Tip: use a fan to push air out and keep a respirator handy for longer sessions.
If the coating is thick
Chemical dwell time — often 15–30 minutes per round — can save hours of sanding and reduce disc wear and cost.
Wrap treated areas to keep the stripper wet and cut total time and material waste.
If you have detailed work or veneer
Chemicals plus stiff brushes reach crevices without rounding profiles. For veneered pieces, choose gentler products and use light, conservative sandpaper passes if needed.
Protect edges and test a small section before you commit to any aggressive approach.
- Decision guide: match method to workspace, layer thickness, and detail level.
- Indoors: favor lower-fume chemicals and airflow; outdoors: faster options work well.
- Busy schedule: factor in dwell minutes versus sanding time and disc replacement cost.
Build in drying and cleanup time. Rushing creates the most surface damage and safety mistakes, so plan your project with margin.
Conclusion
Let the material and the job plan decide whether you strip, sand, or combine both methods.
For safety, avoid methylene chloride and NMP, ventilate well, and keep chemicals far from any open flame. Lay rag flat to dry and dispose of residue and remover waste responsibly. Keep water handy only when product instructions allow it.
Practically, stripping often wins for carved detail and many layers. Sanding works best on broad, flat panels. The hybrid approach—strip, scrape, clean with mineral spirits or Afterwash, dry, then sand lightly—covers most pieces and helps stains look even.
Final checklist: control fumes and dust, protect edges and grain, manage cloth and rags, and follow disposal rules. Do that and you’ll end with a better-looking piece of furniture and a safer, less stressful job.


