Set expectations: You can often disguise scratches so they blend in at normal viewing distance, even if the mark isn’t fully removed. The fastest way is a touch-up kit (markers, filler, wax) plus a protective top coat to revive sheen.
This short guide gives you DIY options from quick camouflage to full leveling and refinishing. You’ll learn a simple decision path: assess depth → confirm finish → prep/clean → choose a method → restore protection. That way you pick the right repair for each piece.
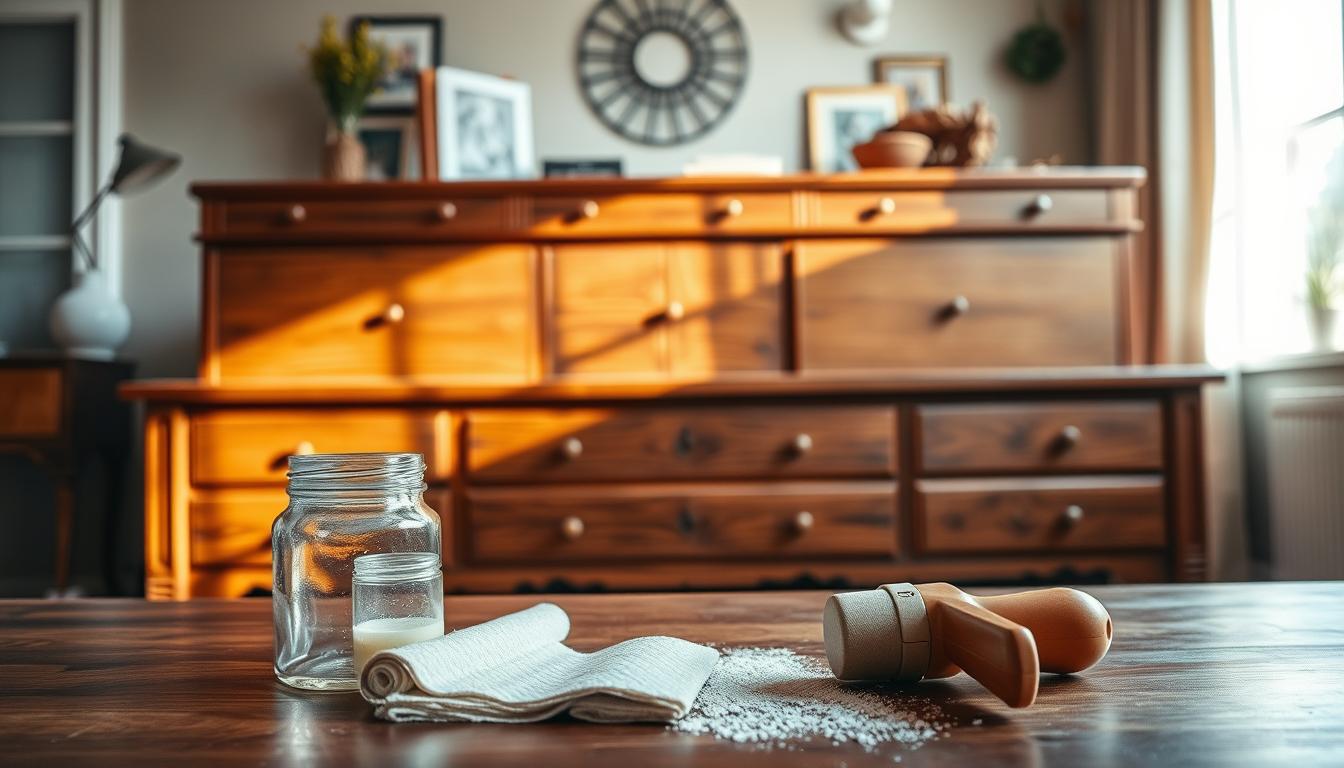
Why marks stand out: scratches disrupt color, sheen, and the grain. The best fixes fix color first and sheen last. Your starter toolkit can include lint-free cloths, touch-up markers, wax fill or a crayon in a pinch, filler for deeper gouges, and an oil or restorer for final shine.
Test in a discreet area before you commit. Work gently, follow the grain, and avoid soaking finishes. Doing so protects the piece and helps your home furniture look naturally refreshed.
Assess the Scratch and Your Furniture Finish Before You Start
Start by judging how deep the damage is and what kind of finish covers the piece. A quick depth check tells you if a light touch-up will do or if you need filler and leveling.

Test depth: run a clean fingernail over the mark. If it doesn’t catch, it’s usually a surface scuff. If your nail grabs, you’re likely dealing with deeper scratches that need filling or sanding.
Most visible table marks sit in the finish layer, not the fibers. That means many repairs target the seal instead of the core material. Identifying this saves time and prevents wasted effort.
- Grain rule: always work with the grain when rubbing, buffing, or sanding so new marks blend into the pattern.
- Finish check: oil or wax finishes refresh easily but react to strong cleaners; varnish and lacquer form a harder film that holds colorants on the surface.
- Method tie-in: markers and restorers sit on sealed finishes; oils darken exposed lines; waxes or filler fill voids in deeper areas.
On dining tables, repeated wear often concentrates in high-use areas. For those spots, color correct first, then protect the whole area to even out sheen.
Prep Work That Makes DIY Scratch Repair Look Professional
Before you add color or filler, spend a little time on careful cleaning. Proper prep saves time and helps your repair blend into the surrounding area.

Start with a lightly damp cloth and warm water for finished exterior surfaces. Wring the cloth so it is just damp; do not flood the piece. Too much water can swell the grain and change the look of the wood.
Clean without harming the finish
Wipe gently along the grain. Use a separate lint-free cloth for the final pass so you reduce streaks and lint.
Remove dust and debris
- Wipe twice: one pass to lift dust, a second clean pass so no particles remain in the scratch line.
- Keep two cloths: one for applying product and a lint-free cloth for wiping to avoid smearing pigment or leaving residue.
- Remove excess product immediately with the lint-free cloth to prevent blotchy spots.
Pick a discreet test area
Choose a back edge or underside to test markers and color. This single step confirms color match and finish compatibility before you touch a visible area.
Fixing wood scratches with Quick Camouflage Methods
If the mark is light and shallow, quick color touch-ups can hide it in minutes.
When to use markers: Choose markers for tiny scratches, worn edges, and scuffs where the finish is only abraded and the core isn’t gouged. They work fast and keep the repair localized.
Use touch-up markers for tiny scratches and worn edges
Pick a lighter shade first; you can always layer a darker tone. Apply the marker tip directly inside the scratch line, following the grain so the mark blends with surrounding colors.
How to apply marker and wipe off excess with a lint-free cloth
After a single precise pass, immediately remove extra pigment with a lint-free cloth to avoid haloing. A dab of lemon oil on the cloth can help the color melt into the sheen and moisturize dry spots.
Let repairs dry, then check in different light before adding more color
Let the marker sit about 20 minutes. Inspect the area from several angles and under different light to see if the tone matches.
- Layer in thin passes: Add small amounts rather than heavy coats to match natural variation.
- Precision tip: Run the marker only in the line to keep the repair tight and realistic.
- Final check: If needed, repeat short passes and wait between them until the repair sits right.
Remove Scratches with a White Vinegar and Olive Oil Method
This is a low-cost, gentle option for light, surface-level marks on a table. It works best on sealed finishes where you want a quick, nonabrasive fix that blends color and sheen.
Mixing ratio and why it works
Combine 100 ml white vinegar with 200 ml olive oil and stir until even. The vinegar loosens surface dullness while the oil buffers acidity and helps darken exposed lines.
How to apply
- Soak a soft cloth in the mixture and squeeze it so the cloth is damp, not dripping.
- Rub the area in small circles briefly, then stroke gently along the grain.
- Let sit about 2 minutes so the oil can penetrate the line, then wipe residue and buff along the grain until even.
When to repeat and when to move on
- Repeat the method once or twice if the mark improves.
- If the mark remains visible or is deeper, choose wax fill or a filler rather than overworking the finish.
Use Wax-Based Fills to Disguise Slightly Deeper Scratches
When a light color touch-up won’t hide a shallow groove, a wax-based fill often does the trick. Wax fills physically occupy the void so the mark stops catching bright light and becomes far less visible on your table surface.
When to use this method: Choose a wax or filler when vinegar and oil didn’t help and a marker can’t hide the depth because the surface is no longer level.
Pick the right color and prep
Choose a crayon-style wax that’s close to your table finish, often a bit darker so the filled line reads like a shadow, not a pale stripe. Test on an underside or edge first.
How to pack, level, and blend
Rub the wax into the line both lengthwise and crosswise to fully pack the deepest part. Use the edge of a credit card to scrape off and remove excess, leaving a flat surface.
- Buff with a soft cloth along the grain until the sheen matches.
- Repeat in thin layers if needed, but remove excess each time to avoid a waxy buildup that attracts dust.
- These simple steps will leave the table feeling smooth and the repair nearly invisible.
Repair Deep Scratches with Wood Filler and Color-Matching
When a gouge removes material, you need a rebuild-first approach. Define deep: if the mark is a groove or gouge that takes out surface material, use wood filler to level the area before any color work.
Application and clean-up
Press filler into the groove so no air gaps remain. Use a putty knife or credit card to pack and then remove excess while the compound is still soft.
If small residue clings, wipe with a damp cloth to remove excess before curing.
Dry time discipline
Let the filler dry fully per the label. Rushing to sand or stain can tear the patch and create a fuzzy edge.
Wait the recommended minutes and only sand with 180–240 grit if needed.
Color layers and grain mimic
Match the finish by using multiple tinted fillers or light coats of stain. Paint darker grain lines with a fine brush, add lighter tones in adjacent areas, and work in small sections so edges blend.
Soften transitions by gently blending with your fingertip. For stubborn grooves, press a bit of wax-based filler into the deepest spot, level with a card, then re-tint to match.
- Realism check: inspect the repaired areas from standing height; the piece should read correctly at normal viewing distance.
Sandpaper Method for Scratches Wood Furniture That Need Leveling
When the finish will not accept marker or wax, sanding gives you a flat base to rebuild. You choose sanding when the damage leaves a groove you can feel, or when the surface film is failing and color products won’t sit evenly.
Choosing the right grit sequence and avoiding visible sanding marks
Follow a grit roadmap: start at 180 grit for light leveling, then refine with 240 grit to blend. For deeper damage, begin at 120 grit, move to 180, then finish at 240.
Do not skip from 120 straight to 240. That mistake leaves coarse sanding marks that show under a new finish.
Always sand with the grain and clean dust before refinishing
Sand only along the grain so new sanding lines disappear into the pattern. After sanding, remove all dust with a vacuum and a lint-free cloth.
Cleaning dust is crucial: trapped particles will dull your oil or wax and make the table feel gritty.
When sanding is the best option
Sanding is the right step when you must level the surface to remove a visible scratch or when markers and wax fillers fail to hide scratches wood furniture.
- Decision step: If you only need color, skip sanding.
- Steps to remove scratches: sand in stages, clean thoroughly, then restore protection with oil, wax, or restorer.
- Outcome: Proper sanding lets you remove scratches wood and achieve a smooth, even finish on your table.
Restore Sheen and Protect the Surface After You Remove Scratches
A proper finishing layer makes the repaired area match the rest of the table and adds protection. Even if color blends well, mismatched sheen or an unprotected spot will reveal the repair over time.
Choose the right finish for your furniture
Pick one option based on the original surface: wax for a soft glow, oil to nourish and darken slightly, or a furniture restorer for sealed finishes. Each choice both evens shine and adds a protective layer.
Apply thin coats and follow the grain
Use a small amount on a lint-free cloth and wipe with the grain. Build sheen with multiple thin coats rather than one heavy coat to avoid streaking.
Timing, streak fixes, and buffing
Let each coat set about 20 minutes before adding another. If streaking appears, apply the next coat opposite the grain direction to level the look, then finish with a light with-the-grain wipe.
- Buff off excess after the product hazes to prevent a tacky surface.
- Focus on edges and corners where buildup tends to collect.
- Protecting the full area on a dining table reduces friction and helps the finish last longer.
Conclusion
Finish with the gentlest method that still hides the mark from normal view. Assess depth, confirm the finish, prep the area, choose the least aggressive method, then restore sheen for a uniform look.
Quick wins include touch-up markers for tiny scratches, the vinegar-and-oil mix for light surface scuffs, and wax fills when a groove needs physical filling. If the mark still shows after two or three passes, step up to filler, stain layering, or sanding.
Always work with the grain when you rub, sand, stain, or buff. Protect high-use pieces like a table with wax, oil, or a restorer and buff off excess so the finish cures cleanly.
Wipe water spills promptly, use coasters, and refresh protective layers periodically. With basic care, your furniture can look refreshed and most marks will blend at normal viewing distance.


