You’re likely facing a small but annoying problem: a stripped screw hole that spins and won’t bite. This often shows up on door hinges after repeated opening and closing. The good news is you can often repair it quickly with items you already have.
This toothpick-and-glue method is fast, low-cost, and works best for light-to-medium duty hardware like hinges, cabinet pulls, and latch plates. It restores grip so a new thread can form when you drive the screw back in.
You’ll follow a simple sequence: remove the screw, pack the hole with toothpicks or matchsticks, add a little wood glue, trim and let it cure, then reinstall the screw with controlled torque using a manual driver. Key success factors are correct bit fit, avoiding overtightening, and waiting until the glue sets.
If this does not hold, the guide previews stronger repairs such as a longer screw, a dowel plug, or an anchor kit. Work slowly, keep the fastener straight, and aim for a snug hold without forcing the wood again for safe, lasting results in your home.
Why stripped screw holes happen in wood and how to spot the problem
When hardware begins to shift, the underlying attachment point is usually to blame. Wear from constant movement, like a door hinge that opens thousands of times, slowly removes wood where the thread once gripped. Seasonal expansion and contraction can also loosen the connection over months.

Common real-world causes include repeated stress on hinges, cabinets that get pulled, or added weight on a mount. Using a high-speed drill without torque control near the end of the drive can tear fibers and ruin the thread engagement.
- Angled driving cuts unevenly and widens the hole, so the fastener fails sooner.
- Overtightening chews wood fibers; the final turns do the most damage.
- Wood movement slowly enlarges the hole, making the fit loose over time.
How to tell it’s the hole: the fastener spins without tightening, a hinge leaf shifts, a door sags, or hardware pulls away. Check the screw head and bit fit first, then try another screw or inspect the hole diameter to confirm the problem is the surrounding wood.
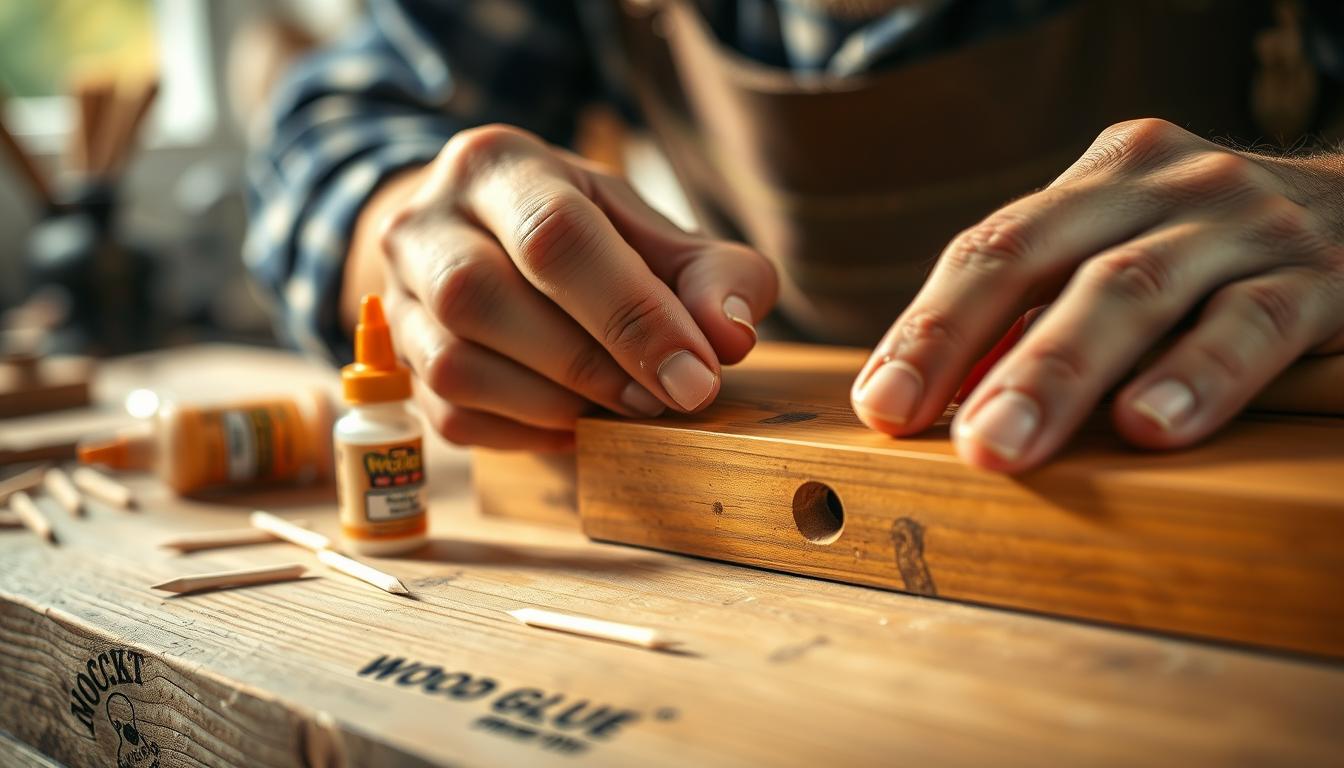
Tools and materials you’ll need for the toothpicks and wood glue method
Gather a few simple items before you begin. This keeps the repair tidy and helps you control the work.

Core items from home: toothpicks, a drop or two of wood glue, and a manual screwdriver so you can feel resistance and avoid re-striping the repair.
- Choose a wood-rated adhesive that dries hard so the threads can form again; many people use Gorilla Ultimate Waterproof Wood Glue.
- Keep a rag or paper towel handy to wipe excess glue before it skins over.
- Check fit and size: toothpicks should pack tightly and your screw and bit should match to prevent cam-out and damaged heads.
Optional tools to improve results: a drill or drill/driver used at low torque, a matching drill bit to clean ragged edges only if needed, and fine sandpaper to level any proud filler after curing.
If the hole is too blown out later, consider a plastic anchor, a small repair kit, or stepping up to a dowel plug for a heavier-duty fix.
Fixing stripped screw holes with toothpicks and glue
Start by removing the loose fastener and inspecting the head for damage. Check the driver bit for a snug fit and measure the hole size to decide if this simple repair will hold.
Remove and inspect
Back the screw out and confirm the head and bit match to avoid cam-out when you reinstall. If the hole is large, consider a heavier repair instead of this method.
Choose filler and apply glue
Force 1–3 toothpicks into the hole until the fit is snug, add a drop or two of wood glue, then press them tight so they contact the sides.
Pack, trim, and cure
Snap the toothpicks flush and wipe away excess glue right away. Let the glue cure per the label so the new threads can form reliably.
Reinstall and test
Drive the screw straight with a manual screwdriver or low-torque setting. Stop when the head seats to avoid boring the filler out. Tug the hardware and cycle the hinge; if the screw still turns, remove it and add more filler, then repeat.
- Tip: Use a pilot if alignment is tricky.
- Tip: Reduce filler and force on thin or dry wood to prevent splitting.
- Tip: Sand any proud filler after full cure for a neat finish.
When toothpicks aren’t enough: other reliable ways to repair stripped screw holes
Sometimes the best next step is to change the fastener or rebuild the wood anchor. Pick a method that fits the load, the material, and the tools you have. Below are practical, stronger options when a simple filler won’t hold.
Step up to a longer or slightly wider fastener
Longer screws are often the quickest fix in wood. For door hinges, consider 2-1/4″ to 3″ lengths so the new screw reaches deeper, sound wood.
If you prefer a wider option, increase by only one gauge to avoid splitting. Drive slowly and use low torque so the jamb or material does not shift.
Use a hardwood dowel plug and re-drill a pilot
For a heavy-duty repair, drill out the damaged area and glue in a hardwood dowel.
After the glue cures, trim and sand flush, then drill a correct pilot hole and install the new screw. This creates solid new threads that hold under load.
Quick reinforcement: kits and plastic anchors
Metal-screen repair kits mimic threads and work when you want a fast solution without enlarging the hole.
Plastic snap-off anchors act as cone-shaped fillers that form new threads. They’re handy when you lack a drill or want a neat, quick anchor.
- Decide to escalate if the hole is too wide, wood crumbles, or the hardware is load-bearing.
- For metal, consider a wider fastener, liquid thread repair, or threaded inserts (Heli‑Coil/E‑Z‑Lok).
- Match the method to material, load, and the toolset to avoid repeat stripping.
Conclusion
A quick check and the right choice of repair save time and prevent repeat failures. Diagnose the problem, pick the right method, and restore bite so the fastener holds securely again.
For moderate damage, the toothpicks-plus-glue trick restores a worn screw hole fast and cheaply. Let the glue cure, trim flush, and reinstall carefully to form new threads.
If the hole is enlarged or the application carries load, step up to a longer screw, a dowel plug, or a repair kit with inserts. Remember wood and metal need different solutions; don’t force a wood fix into a metal repair.
Drive straight, avoid overtightening, use the correct bit and size, and keep basic tools and extra screws on hand. Address looseness early to save work later.


