You’ll learn simple, practical steps for Fixing a sagging wood panel so your drawer slides true and holds weight without bowing or popping out.
Start by diagnosing whether the panel is the issue or if worn guides, loose frame joints, or poor fit are to blame. In many cases you can reuse the original wood panel, even flip it, after you improve support.
Expectations: small splits or undersized pieces may need replacement, but many problems are solved by re-squaring the frame, tightening joints, or adding simple supports.
This guide walks you through diagnosis, tools, non-replacement fixes, then full panel replacement for a durable result. You’ll also see why runners, side grooves, and the drawer frame matter as much as the bottom.
Once you confirm the construction style, you can apply the same steps across multiple drawers in a piece of furniture, saving you time and effort.
How to Diagnose a Sagging Drawer Bottom and What’s Really Causing the Problem
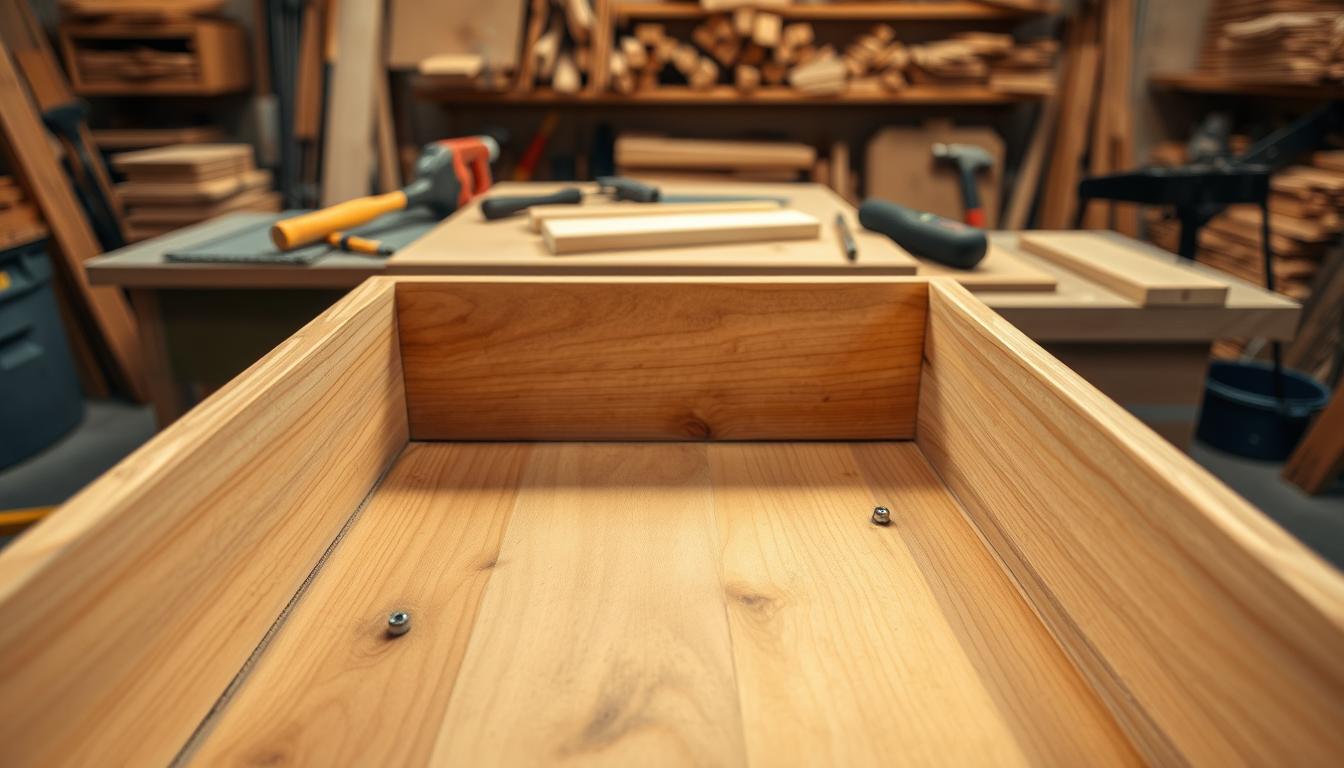
Begin with a close inspection: how the panel rides in the side grooves often reveals the root cause. Pull the unit out and look along the sides to see whether the panel sits loosely in the dadoes. A correctly seated panel must have a little room for seasonal movement.

Check groove fit and short-panel symptoms
If the panel does not reach the grooves from front to back, the sides may have spread. That “short” panel symptom often points to loose joints at the corners that need re-gluing and clamping.
Look for worn grooves, strips, and runner wear
Inspect the lower edge of each side for widened grooves or missing support strips. Also check runners or guides for rough spots; binding there makes the piece ride crooked and stresses the panel.
Spot holes and hardware abrasion
Old metal stops or other hardware can abrade the panel and make holes under the unit. These punctures may mirror damage in the board below and must be addressed before reassembly.
- Remove the unit and view the inside drawer to confirm dado seating.
- Measure front-to-back fit to detect a short panel.
- Examine corner joints and side grooves for looseness or wear.
- Check runners, strips, and any abrasion or holes from hardware.
Decision checklist: based on groove fit, joint tightness, and hole or edge wear, decide whether you can repair the existing panel or should replace the board for a lasting fix.
Tools and Materials You’ll Use for Drawer Bottom Repair
Start by gathering tools and choosing materials that suit the age and construction of the piece. Use materials that respect original work on antiques, or stable modern options for everyday utility pieces.

Hand tools and basic kit
Keep a tape measure, combination square, utility knife, small pry bar, hammer, clamps, sandpaper, and a saw sized for the panel cuts.
Choosing wood or plywood
Plywood is stable and common for utility use. Solid wood matches older furniture behavior and appearance and is best when authenticity matters.
Thickness, glue, and fasteners
- Match the original panel thickness so it fits the grooves without forcing the frame.
- Use wood glue to tighten joints and attach support strips, but do not glue the panel into the grooves; allow seasonal movement.
- Drive long brad nails into new hole positions to secure the back rail; countersink nails so they don’t catch. Use screws where you may need to remove braces later.
- Use hardwood for wear surfaces like runners and build-up strips to avoid rapid wear and renewed binding.
Safety and quality checklist: dry-fit pieces, clamp square while glue cures, wipe squeeze-out, and countersink nails so nothing protrudes to scrape guides or snag stored items.
Fixing drawer bottoms without replacing the entire panel
Start by removing the unit and checking whether the sag is only in the panel or caused by the frame. Small fixes often let you reuse the original wood piece and save time.
Flip the panel and test fit
Slide the bottom partly free and turn it so the bowed face points up. That arch often restores support and buys you time before any cut is needed.
Square the frame and secure loose joints
Re-glue corner joints and clamp the frame. Pull the sides back so the panel reaches both grooves evenly. Let the glue cure before proceeding.
Rebuild worn edges and back support
Glue and pin thin replacement strips to the lower edge of the drawer sides to rebuild the bearing surface. If the panel is short front-to-back, add a same-thickness strip to the back edge.
Fasten and prevent re-damage
Do not glue the back to the bottom. Drive long brad nails through new hole positions into the back so future service is easy. Smooth any rough spots and wax guides or lightly sand rubbing points to stop binding.
- Quick check: test-fit, slide fully closed, and look for protruding nails or snagging hardware.
How to Replace a Wood Drawer Bottom Panel for a Long-Lasting Repair
Start the replacement by removing one end of the unit so the panel can slide free without prying the sides apart.
Disassemble safely: remove the front or back rail screws and ease one end off. Do not force the sides; the bottom should slide out of the dadoes cleanly.
Measure and cut
Measure the groove-to-groove opening and the groove depth. Cut the new panel to the exact board size so it seats in the dado but still floats for seasonal movement.
Choose material and prep edges
Use plywood for modern utility pieces and solid wood for antiques where original construction matters. Dry-fit the piece and file or sand edges until the panel sits evenly along both sides and the back.
Reinstall supports and reassemble
Remove any tacked molding or triangular blocks and refit them to support the new panel. Reattach the end rail, drive screws where required, and test the drawer for smooth travel and correct face alignment.
- Verify clearance for expansion.
- Confirm nothing rubs at full extension.
- Perform a final smooth-slide test before returning to service.
Conclusion
A good outcome depends on stopping the wear that caused sagging in the first place. Address loose joints, spread sides, worn support surfaces, and any binding guides so the bottom stays supported and the unit slides true.
Standardize your measurements and method, then repeat the same steps across similar drawers in the same piece of furniture to save time and get consistent results.
Protect your work: wax guides or use silicone, sand only the high spots, and seal exposed raw wood with shellac to reduce swelling. Keep screws snug and avoid gluing the back to the bottom so future service stays simple.
Quick maintenance checklist: inspect for new rub marks every few years, re-wax contact points, test full extension, and tighten removable supports if needed.
Decide by condition: reuse and support the original panel if it is sound; replace a compromised board but preserve a floating fit for long-lived performance.


