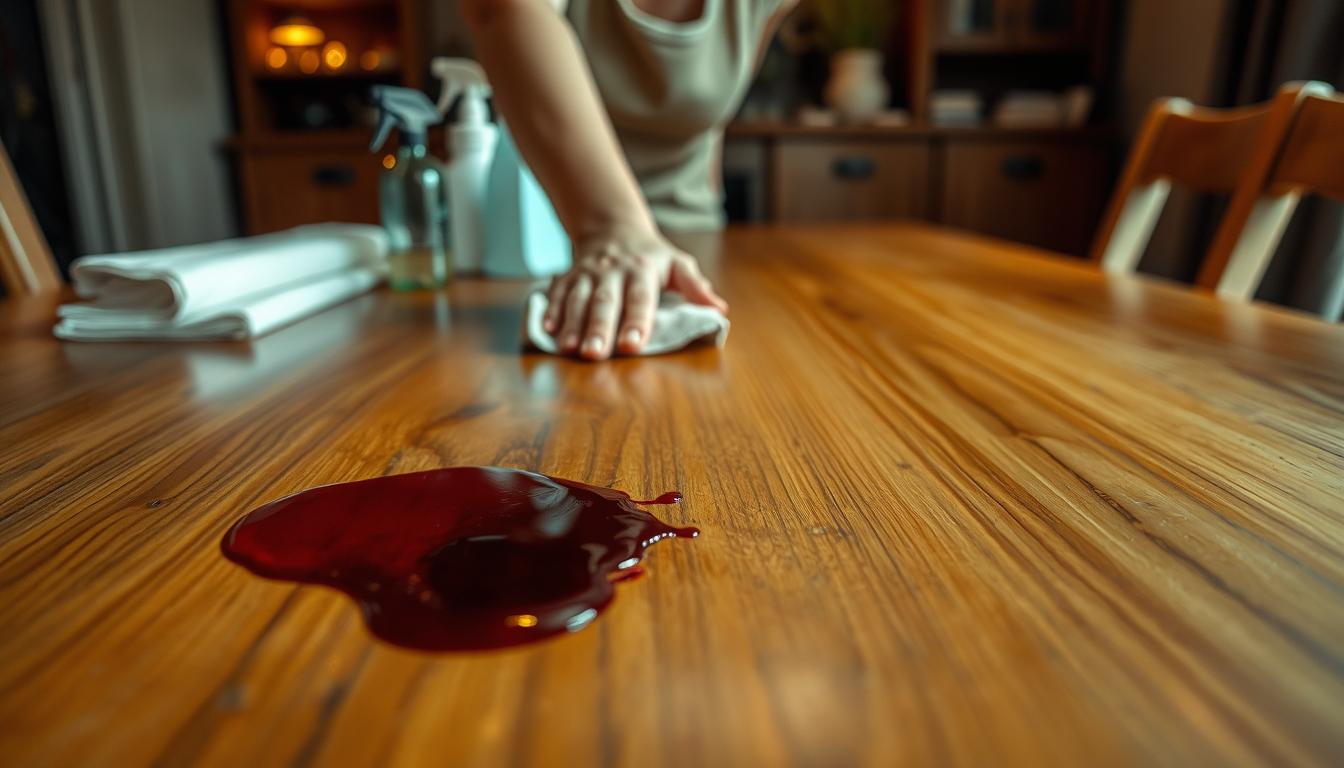
Act fast: when red wine or juice hits a finished surface, blot the liquid right away to stop absorption. Use a soft cloth, not a scrub, and work from the edge of the stain toward the center to limit spread.
Next, wipe gently with a damp (not wet) cloth and a mild soapy solution. Dry the area immediately to prevent warping and finish damage. If color or residue remains, you will follow careful escalation methods such as vinegar/water for grime or mineral spirits for old polish buildup.
This guide previews simple decision points: identify the finish or unvarnished surface, choose safe products by type, and know when stains need refinishing. You’ll get clear steps and the right time to escalate care.
Most fresh accidents are manageable with common household items if you avoid soaking and harsh scrubbing. The focus here is on household furniture and tabletops, not outdoor decks or industrial surfaces.
Act Fast When a Spill Hits Wood
The moment liquid touches a finished surface, move quickly to limit damage. Grab a clean cloth right away and work calmly — speed plus the right technique prevents most stains.
Blot the liquid immediately with a dry cloth to prevent stains
Use a soft, clean dry cloth (or paper towel in a pinch). Press and lift—do not rub—to pull the liquid up without forcing pigment into the grain.
Switch to a barely damp microfiber cloth to lift remaining residue
Once the first cloth is saturated, switch to a barely damp microfiber cloth. The damp cloth helps remove sticky sugars or film while keeping extra water off the surface.

Dry the surface right away so water doesn’t sit and warp the wood
Finish with another clean microfiber or dry cloth and wipe until the area feels dry to the touch. Standing water can swell fibers, haze some finishes, or lead to warping over time.
- Do not scrub aggressively.
- Do not use a soaking wet rag.
- Do not let the spill air dry.
- Done looks like: no tacky residue and the surface feels dry to the touch.
Assess the Wood Surface Before You Clean
Start by scanning the surface to decide whether it has a sealed coat or is bare and thirsty. You want a quick read: a sheen usually means a finish, while dull, porous grain often signals unvarnished material.
Do a simple test: place a tiny drop of water. If it beads, you likely have a sealed finish that tolerates a lightly damp cloth. If it darkens quickly, act with minimal moisture and faster action to avoid deep staining.

Finished surfaces often allow gentle wiping and immediate drying without stripping the finish. Unvarnished pieces absorb liquids fast and need near-dry methods to limit penetration.
Quick checklist before you proceed
- Look for sheen, feel porosity, and watch if liquid beads or darkens the area.
- Remember that surface stains on a finish are often removable; darkened spots may mean penetration and possible refinishing.
- Consider age and value of furniture pieces—older or antique items call for conservative care and testing first.
Also note that heat, direct sunlight, and high humidity worsen moisture-related damage over time. Keep furniture away from intense light and heat while you decide on a cleaning approach. Your goal is to use the gentlest method that restores the top layer without stripping the finish.
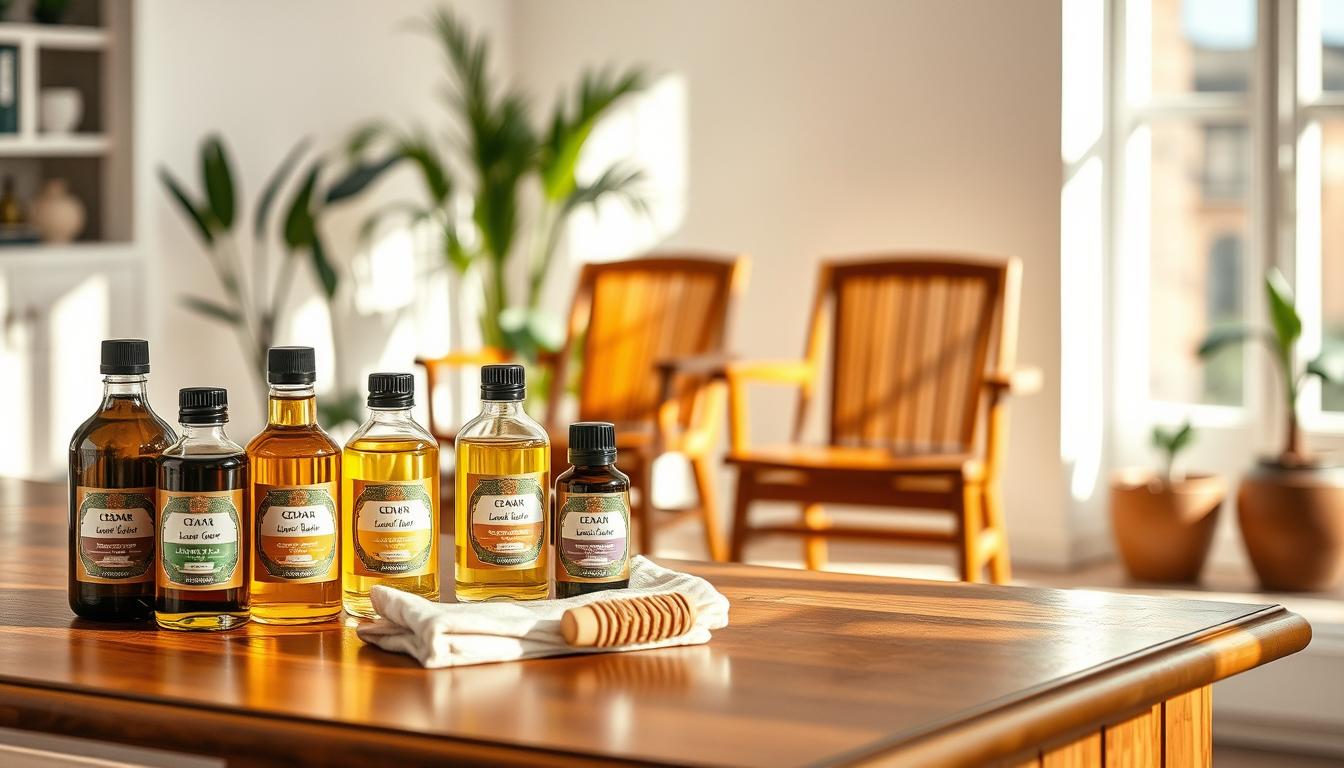
Set Up a Safe, Gentle Cleaning Kit
Gather a small kit of gentle supplies so you can act quickly and safely. Having the right items ready speeds cleanup and reduces risk to the finish.
Microfiber, cotton, and why slightly damp matters
Bring multiple clean microfiber cloths and a soft cotton cloth as a backup. Use the microfiber for lifting liquid and the cotton to avoid scratching delicate finishes.
Keep your cloths slightly damp—moist enough to pick up residue, not wet enough to seep into seams or joints. Wring the cloth until it barely feels damp before you touch the surface.
Simple DIY solution and when to use a dedicated cleaner
Mix a few drops of dish soap into a cup of lukewarm water to make a mild wash solution. Dip the cloth, wring thoroughly, and use the slightly damp cloth to wipe, then dry immediately with a second cloth.
If grime returns often or the manufacturer recommends a product, choose a formulated wood furniture cleaner. Test any cleaner on a hidden spot first to check for dulling or finish lift.
- Core kit: microfiber cloths (x2), cotton cloth, small bowl, dish soap, lukewarm water.
- Set two stations: one damp cloth for washing and one dry cloth for immediate buffing.
- Avoid glass cleaners or heavy-residue products that can harm finishes or attract dirt.
Cleaning wood after spills without damaging the finish
Work in small passes so you control moisture and protect the finish. Start with a barely damp cloth, not a wet one, and move in long, even strokes that run with the grain.
Wipe with a damp cloth in the direction of the grain
Use light pressure and smooth, continuous strokes along the grain. This reduces visible streaking and cuts the chance of tiny scratches that dull a table or other surfaces.
Use a drop of dish soap for sticky spots, then wipe clean and dry
If residue remains, add one drop of dish soap to your microfiber cloth and test in a hidden spot. Gently lift the stickiness, then remove any soap film with a clean damp cloth and dry immediately.
Avoid soaking the area to prevent moisture damage
Keep your cloth well wrung so water never pools near seams or hardware. Work the area in short cycles: clean, check, and repeat only if the surface shows improvement.
- Technique: light pressure, long strokes, grain direction.
- Sticky residue: one drop of dish soap, test first, rinse and dry.
- Moisture control: small passes, wrung-out cloth, immediate buffing.
How to Remove Red Wine and Juice Stains From Wood
Start by identifying whether the mark is sticky residue or a pigment stain so you choose the right method.
Residue feels tacky and lifts with gentle wiping. Pigment staining leaves color that may soak into the grain. Treat residue first; tackle pigment next.
Lift color and grime with gentle passes instead of aggressive scrubbing
Use a clean cloth and make light, repeated passes. Rinse or rotate the cloth often to avoid moving color back across the surface.
Try diluted white vinegar and water for dirt and grime buildup
Mix vinegar and water at no more than 50:50. Spot-test in a hidden area first.
Gently work the diluted vinegar solution with a soft cloth to remove dirt and grime. Wipe with a damp cloth of plain water, then dry immediately.
Know when a stain may require refinishing if it has penetrated
If darkening remains after cleaning and drying, the pigment likely penetrated the finish. Signs include a permanent dark patch or an area that stays discolored when dry.
Stop DIY attempts if the stain spreads, the finish softens, or sheen becomes uneven. In those cases, professional refinishing is a realistic next step.
- Quick steps: identify residue vs. pigment, gentle passes, dilute vinegar test.
- Do more: repeat short cycles, rinse cloths, check progress often.
- Know limits: deep stains may lighten but often need refinishing to disappear completely.
Deep Clean Options for Unvarnished or “Unfinished” Wood
For unvarnished pieces, remove loose debris before any moisture touches the surface. Porous grain soaks liquids fast, which can set stains and raise fibers. A dry-first approach reduces risk and keeps dirt from embedding deeper.
Follow a safe sequence: use a soft brush to loosen dust in pores, then vacuum those crevices to pull out grit. This clears the area and prevents you from rubbing dirt into the grain when you wipe.
Next, pass a dry microfiber cloth over the surface to catch remaining dust and surface dirt. Repeat this regular dusting often so grime does not become ingrained.
If spots remain, mix a tiny amount of dish soap into lukewarm water and wring the cloth until it is slightly damp. Work quickly, wipe the mark, then dry the spot right away.
- Gently rub stubborn marks with a pencil eraser.
- Knead adhesive rubber and press it into the grain to lift embedded dirt.
- Avoid melamine-type erasers or stiff scrapers that can act like sandpaper.
Finish by drying thoroughly and keeping a schedule of regular dusting to protect the surface. Small, frequent care prevents deeper grime and keeps unfinished pieces looking their best.
When to Escalate to Mineral Spirits and Other Stronger Methods
If sticky film or old polish resists gentle care, move carefully toward stronger solvents. In extreme cases, mineral spirits can dissolve waxy buildup and stubborn residue that soap and water won’t lift.
Using solvents safely for stubborn buildup
First, test in a hidden area to confirm the solvent won’t remove the finish. Work in a well-ventilated space and keep children and pets away.
Safe technique and what to watch for
Apply a small amount of spirits to a clean microfiber cloth—never pour directly on the surface. Rub gently in the direction of the grain and rotate to a fresh cloth section as the film transfers.
- Escalation includes: old waxy polish, sticky film, or buildup soap can’t remove.
- Safety checklist: ventilation, minimal product, spot-test first.
- Watch for: finish softening, color transfer, or uneven dulling—stop if any appear.
- Final step: if polish or marks remain in the area, refinishing or professional repair may be needed.
Mineral spirits address surface residue and polish buildup, not deep pigment that soaked into bare grain. Use these methods sparingly and decide on refinishing when safe attempts don’t restore the surface.
Fix Common After-Spill Marks Like Water Rings and Dull Spots
Even a brief wetting can leave pale rings and dull spots; use gentle fixes to restore shine. Rings form when moisture sits on the finish and alters the surface sheen. Dulling can appear once the surface dries, even if the liquid was removed.
Remove water marks with non-gel toothpaste and a soft cloth
Dab a small amount of non-gel (gel-free) toothpaste onto the mark. Rub gently with a soft cloth in circular, light motions until the ring fades.
If the mark persists, mix equal parts baking soda and toothpaste and repeat the same gentle rubbing. Wipe residue with a clean damp cloth and dry the area thoroughly.
Buff lingering rings with olive oil or an oil-based furniture polish
Apply a tiny amount of olive oil or an oil-based furniture polish to the spot. Let it sit about 30 minutes, then buff with a soft cloth to even the sheen.
Test first: try any oil or polish on a hidden area of the piece if you’re unsure of the finish. Avoid heavy applications that leave an oily film or attract dust.
- Why rings appear: brief moisture alters the finish sheen, not always pigment.
- Toothpaste method: non-gel toothpaste + soft cloth; escalate with baking soda if needed.
- Oil/polish step: small amount, wait ~30 minutes, then buff to restore shine.
- Guardrails: test first, don’t overapply oil, and stop if the finish reacts.
Protect and Maintain Wood Furniture So Spills Don’t Become Damage
Set a simple cadence for care so your furniture resists stains and wear over time. Small, regular steps cut the chance that a wet ring or pigment will become permanent.
Weekly dusting to prevent scratches
Dust at least once a week with a clean microfiber cloth. This removes grit that causes tiny scratches and keeps the surface smooth.
Occasional washing with a wrung-out cloth
Every couple of weeks, wipe with lukewarm water and a few drops of dish soap. Wring the cloth until it is only damp, wipe, then dry immediately to control moisture.
Polish or wax correctly to protect the finish
Use a semi-solid polish without silicone. Apply with cheesecloth, let it sit a few minutes, then buff with a microfiber to restore shine. Avoid spray polishes that leave residue.
Shield surfaces and move pieces safely
Use coasters, placemats, or cloth tablecloths to block contact. Skip plastic covers that can scratch. When moving furniture, remove items, wrap with a cotton blanket, and lift—don’t drag. Add felt pads to legs to prevent scuffs.
Control placement and environment
Keep pieces away from direct sun, heat sources, and humid areas. Use blinds or curtains and maintain steady indoor humidity to reduce fading and warping over time.
- Simple routine: weekly dusting and periodic washing.
- Protective gear: coasters, cloth covers, felt pads.
- Polish tips: semi-solid product, cheesecloth, buff with microfiber.
Conclusion
The best defense is a ready kit and swift moves—blot, lift gently, and dry right away. Act fast to limit pigment and keep moisture minimal so the finish stays intact.
Always check the surface first; finished and unvarnished furniture react differently to water and cleaners. Use gentle methods on sealed pieces and near-dry approaches on bare areas.
Keep simple, safe tools at hand: microfiber cloths, mild dish soap, and lukewarm water. Spot-test new products before you use them on visible areas.
For red wine or juice stains, use light passes, try diluted vinegar only when suitable, and accept that deep marks may need refinishing. Build a small kit and store it nearby so you can respond in seconds to future spills.