You want your wood furniture to last and look great. This intro lays out when using a common household acid can help and when it can hurt your finish.
Vinegar can cut grime because it is mildly acidic. It disinfects and handles everyday messes well. But full-strength use can dull or etch a sensitive finish.
This article shows a practical, natural way to keep furniture beauty without harsh chemicals. You will learn surface checks, proper dilution, the right cloth, and fast drying to limit moisture.
Key point: sealed finishes often tolerate a diluted solution, while unsealed, waxed, or oiled pieces need gentler care. We’ll also offer safer alternatives and quick tips for stains and sticky buildup so you don’t rely on one method for every problem.
Is vinegar safe for wood surfaces and finishes?
Household vinegar breaks down residue and can disinfect, but it isn’t harmless to every finish. Its mild acidity helps lift oils and grime, which is why many use a vinegar natural solution for light care. That benefit comes with trade-offs for some surfaces.
Risk rises when you use full-strength vinegar, let it sit, or soak seams. Acid can dull or etch a finish, and excess moisture can warp boards, lift stain, or leave water marks.

When diluted is safer
Diluted vinegar is generally safer on properly sealed pieces for light tasks. Still, “safer” is not risk-free. If you aren’t sure of the finish, spot-test first.
Most vulnerable finishes
- Unsealed or raw wood
- Waxed or oiled surfaces
- Old or failing finishes (cracking, sticky, flaking)
Quick rule: treat furniture vinegar as a spot-tested option and default to mild soap and water or specialist products to avoid harsh chemicals and unintended damage.
What to do before you clean wood furniture
A little prep prevents big problems: remove loose particles before you touch the finish. That first step keeps you from grinding dust and dirt into the surface and creating fine scratches.

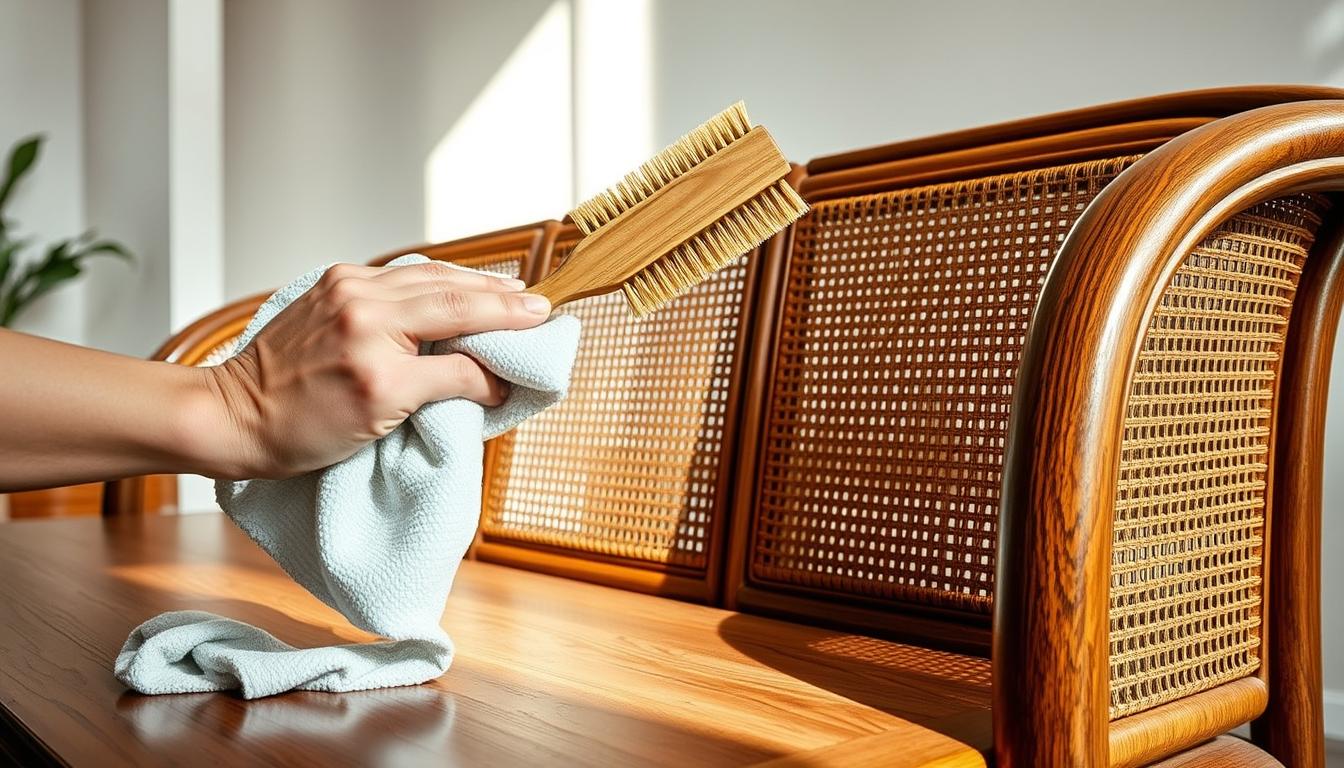
Dust first to prevent scratches
Start by lifting dust with a microfiber or other soft cloth. Use light strokes along the grain so grit is picked up, not dragged across the finish. Dust often to keep abrasive particles from dulling pieces over time.
Test in an inconspicuous area
Always try your solution on an inconspicuous area such as a back edge, underside lip, or inside a leg. Check for lightening, hazy spots, finish softening, or color transfer onto the cloth. If you see any change, stop and choose a gentler method.
Set up your space
Move nearby pieces and protect the floor with a drop cloth or newspaper. Keep a dry towel handy so you can wipe and dry immediately. Make sure the room is well-ventilated and lit so you can spot streaks and residue as you clean wood furniture.
Cleaning wood with vinegar step-by-step
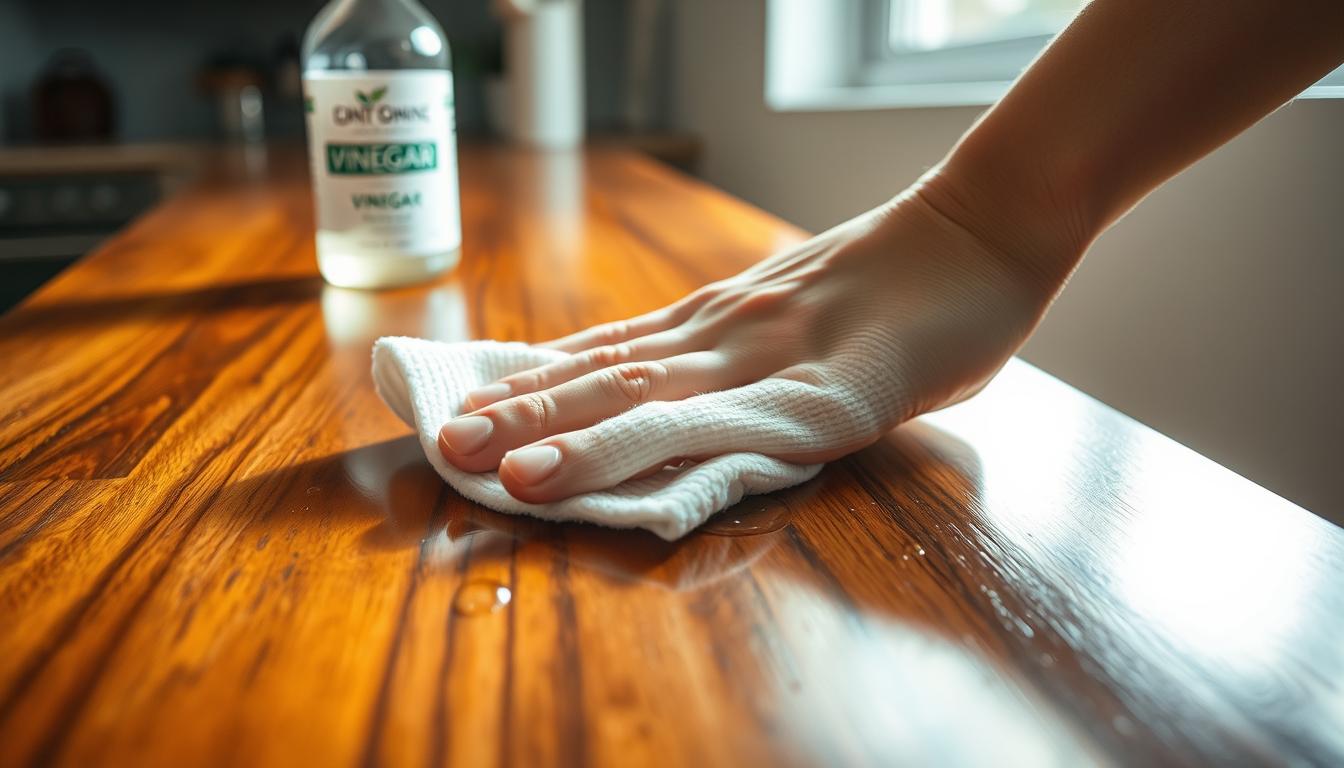
Start by preparing a gentle cleaning mix that removes grime without risking the finish. Use a spray bottle and a soft cloth so you control moisture and contact time.
Mixing the right solution
Combine equal parts vinegar and water for a 1:1 mixture in a spray bottle. This dilution reduces risk compared to full-strength acid and still lifts light soils.
Applying without soaking
Mist the surface lightly or spray onto the cloth, never saturating joints, edges, or veneer seams. Make sure liquid does not pool near hardware or trim.
Lift grime and wipe
Allow a short dwell time — a couple of minutes — to loosen grime but do not let the mixture dry. Wipe along the wood grain using a microfiber or other soft cloth to avoid streaks and scratches.
Drying and when to stop
Immediately follow with a clean, dry cloth to remove moisture and prevent water damage. If one or two light passes don’t work, stop and switch to a gentler method rather than repeat passes or increase strength.
- Check: view surface in angled light.
- Feel: test for tackiness.
- Buff: finish lightly if needed for even sheen.
Common mistakes that can damage wood when using vinegar
Be cautious: simple errors can cause lasting damage to your furniture finish. A few bad choices — too much acid, excess liquid, or rough tools — lead to dulling, rings, and lifted color.
- Undiluted vinegar or long dwell times: Full-strength acid can etch or dull a finish fast. Never leave a solution to sit on the surface.
- Oversaturating with water: Even a mild mix can harm if excess water pools. Moisture can cause warping, raised grain, and persistent water stains.
- Abrasive tools instead of a soft cloth: Scouring pads and rough paper towels scratch and remove finish. Use a microfiber cloth for safe contact.
- Using acid on waxed, oiled, or unsealed furniture: Vinegar can strip wax, break down oil protection, and let stains sink into the wood furniture.
Quick stop checklist: if the surface turns hazy, feels sticky, or transfers color to the cloth, stop immediately. Dry the area and switch methods to avoid more damage.
Watch for early signs — dull shine, rings, lifted color, or a rough texture — and act fast to limit repair needs.
When you should choose a different wood cleaner instead
Sometimes a gentler cleaner is the smarter choice for long-lived furniture. If you care about finish longevity, many furniture specialists favor mild soap and water over acidic mixes. This avoids the risk of dulling or etching delicate surfaces.
Why pros pick mild soap and water
Specialists recommend a nonalkaline soap because it lifts dirt without attacking finish layers. Use suds rather than soaking liquid.
How to make a gentle dish soap mixture
Add a few drops of dish soap to warm water. Dampen a soft cloth and wring it until barely damp. Wipe along the grain and do not flood seams.
Rinse with a second lightly damp cloth if needed, then dry immediately. Controlling moisture matters more than stronger formulas.
When to use a specialized cleaner or polish
Choose a commercial wood cleaner for high-traffic pieces, solid wood antiques, or finishes that streak with DIY mixes. An occasional polish (for example, Guardsman Furniture Polish) can restore sheen, but avoid frequent waxing to prevent buildup.
What to avoid in products
- Silicone: leaves residues that attract dust.
- Bleach and ammonia: can discolor or damage finishes and may darken oak.
- Abrasive chemicals or pads: scratch and strip surfaces.
Bottom line: the right cleaner preserves finish, cuts recurring stains, and reduces the chance you’ll need refinishing. Pick methods that match the value and finish of your wood furniture for the best outcome.
How to tackle stains, sticky residue, and built-up grime safely
Start gently and always test in a small, hidden area first. Stains need different approaches, and a quick spot check prevents visible damage to the finish.
Spot-treating water stains and moisture marks
Begin with the least aggressive options: blot excess moisture and dry the area. For light water stains, a soft cloth and gentle buffing often restores the sheen.
If marks persist, try a denatured alcohol dab or a hydrogen peroxide compress (1:1 with water) for 10–15 minutes, but only after testing a hidden area.
Handling heat stains safely
Heat marks may respond to a low-heat iron method. Place a towel over the mark, set iron to low, and apply briefly.
Check every few seconds so you do not overheat the surface. Stop immediately if the finish clouds or softens.
Removing years of grime
Use a gentle cleaner and repeated light passes rather than one aggressive scrub. Work along the grain with a soft cloth and give each pass a little time to lift dirt.
This method reduces the chance of cutting through the finish on a high-value piece.
Lifting sticky residue
Soften sticky spots with a small amount of olive oil and controlled heat from a blow dryer. Wipe along the grain and then buff with a clean, soft cloth.
If residue stays, repeat gently; do not scrape hard or use abrasive powders except as a last resort and only after testing.
Cleaning carved details and tight areas
Use a soft-bristle toothbrush to lift built up grime and loosen trapped dirt. Work gently and remove loosened residue with a soft cloth or low-suction vacuum.
- When to stop: pause and consult a pro for antiques, deep stains that penetrate the piece, or any finish that turns cloudy or tacky after treatment.
Conclusion
Small habits — dusting, quick spill cleanup, and minimal moisture — prevent most finish problems.
Vinegar can be part of your home solution for sealed pieces, but it is not safe for every finish. Always test first, dust before you start, use a soft cloth, apply only a tiny amount of liquid, and dry immediately to avoid water damage.
For routine care, mild soap and water is often the most reliable cleaner. Avoid wax buildup, silicone-heavy products, and harsh chemicals that leave residues or cause discoloration.
Quick tips: use coasters, wipe spills fast, keep moisture away from seams, and polish only sparingly. Make sure you confirm the finish, pick a gentle product, limit liquid, and stop if the surface looks odd.